ASSESSING SURF CONDITIONS: COMPLETE GUIDE
In this beginner's guide to surfing, we cover the essential skill of assessing surf conditions before entering the water. Learn techniques used by professional surf coaches to discover how proper condition assessment keeps you safe, improves session quality, and accelerates your progression.
Each chapter of the guide highlights different key areas that enable surfers to develop. From efficient paddling to reading waves, each chapter is packed with actionable detail to help you understand and improve your surfing. While written guides provide essential knowledge, learning condition assessment alongside experienced instructors who can point out subtle environmental cues in real-time dramatically accelerates your ability to make smart surfing decisions—this is one of the core skills taught during surf coaching Cornwall sessions where coaches help you develop the judgment that keeps you both safe and successful in the water.
In this chapter, we cover:
- Understanding the three surf zones (whitewater, impact zone, lineup)
- Accurately judging wave height for your ability
- Understanding tide effects on wave shape and quality
- Reading wind direction and strength
- Making informed go/no-go decisions
- Building your condition assessment memory bank
- Safety considerations and risk management

Quick Navigation - Chapter 3
THE THREE ZONES OF THE SURF
Before you can assess conditions effectively, you must understand the structure of the surf zone. Every surfing location—from beach breaks to reef breaks—contains three distinct areas, each with its own characteristics, dangers, and purposes.
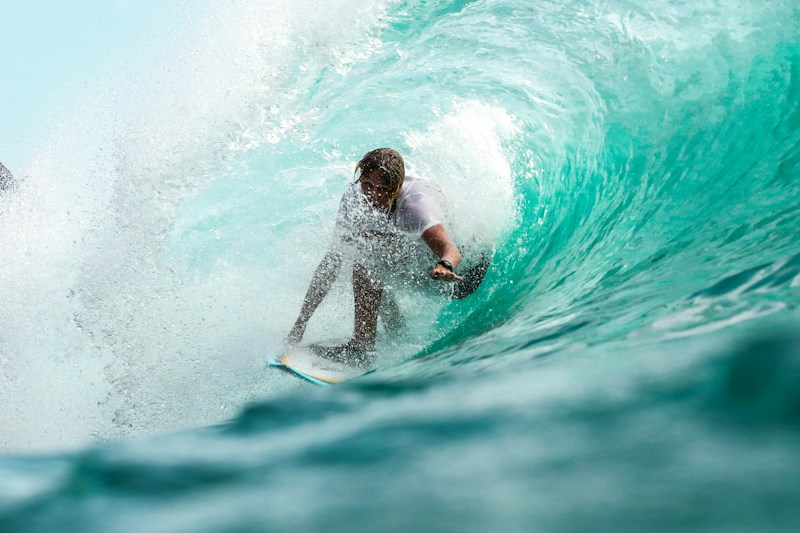
Photo by Jeremy Bishop on Unsplash
Why Zone Understanding Matters
Knowing which zone you're in dictates your behavior, safety protocols, and expectations. Beginners often fail to recognize zone boundaries, leading to dangerous positioning or missed wave opportunities.
Key Point: Your goal is to spend maximum time in the lineup (catching waves), minimal time in the impact zone (danger area), and use the whitewater zone appropriately for your skill level.
Zone 1: The Whitewater
The whitewater zone extends from the shoreline to where waves have already broken and are rolling toward the beach as turbulent, aerated water (hence "whitewater").
Characteristics:
- Depth: Typically ankle to chest deep water
- Wave type: Already-broken waves, reformed whitewater
- Water state: Turbulent, foamy, aerated
- Consistency: Predictable, uniform waves
- Power: Reduced compared to unbroken waves
Purpose for Beginners: This is where surfing education begins. The whitewater zone provides:
- Safe environment for learning pop-ups and board control
- Consistent wave delivery for repetition training
- Reduced consequence for mistakes
- Comfortable depth for standing when needed
- Protection from larger, unbroken waves
Progression Timeline: Most beginners spend their first 3-10 surf sessions primarily in the whitewater zone, building fundamental skills before venturing beyond the impact zone. This foundational phase is critical—professional instructors at Newquay surf coaching programs keep students in appropriate conditions for their ability level, ensuring each surfer builds proper technique in the whitewater before progressing to more challenging zones.
Advantages of Whitewater Learning:
- Weather and wind have less impact on whitewater quality
- More surfing days available (doesn't require perfect conditions)
- Muscle memory development through high repetition
- Confidence building in controlled environment
Don't Rush Past the Whitewater:
Many beginners feel pressure to "graduate" from whitewater quickly. Resist this. Professional coaches keep students in whitewater until pop-ups are consistent and automatic (20+ successful pop-ups per session). This foundation makes the transition to green waves exponentially easier. Understanding when you're ready to progress is one of the assessment skills covered comprehensively in our guide: Six Things to Know Before Your First Surf Lesson.
Zone 2: The Impact Zone (The Inside)
The impact zone is where unbroken ("green") waves transform into whitewater. It's the line where waves reach critical mass and explode with their full energy.
Characteristics:
- Depth: Usually waist to shoulder deep (where waves begin breaking)
- Wave type: Transition from green to whitewater
- Water state: Extremely turbulent, maximum energy release
- Predictability: Chaotic, constantly changing
- Danger level: HIGHEST in the surf zone
Why It's Dangerous:
- Maximum wave energy concentration—where waves hit hardest
- Shallow water depth increases injury risk (hitting bottom)
- Turbulence makes swimming and surfacing difficult
- Difficult to predict exactly where waves will break
- Gets "caught inside" here means taking multiple waves on the head
- Other surfers' boards become projectiles in this zone
The Golden Rule:
"When the wave breaks here, don't be there."
This classic surf saying encapsulates the primary safety principle in surfing. Your objective is to either be:
- Outside the impact zone: In the lineup where waves haven't broken yet
- Inside the impact zone: In the whitewater where waves have already broken
- Through the impact zone quickly: Transitioning from whitewater to lineup via efficient paddling out techniques
When You Must Be in the Impact Zone:
Only three scenarios justify being in the impact zone:
- Paddling out: Brief transit through to reach the lineup
- Catching a wave: The moment you're dropping in (immediately transitioning inside)
- Getting caught inside: Unintentional—when a set catches you between zones
Getting Caught Inside—What to Do:
If caught in the impact zone as a set approaches:
- Don't panic or try to outpaddle it toward shore: You'll stay in the danger zone
- Paddle toward the oncoming waves: Get to deeper water (outside) where they won't break
- Use duck diving or turtle rolling: Navigate through waves efficiently
- Protect your head: If going underwater, cover your head with arms
- Relax between waves: Conserve energy, breathe when you can
Zone 3: The Lineup (The Outback/Backline)
The lineup is the area beyond where waves break—where surfers sit on their boards waiting to catch unbroken waves. Also called "the outback" or "backline," this is the operational zone for wave riding.
Photo by Jeremy Bishop on Unsplash
Lineup Characteristics
Depth: Deep enough that waves don't break (chest to overhead deep, varies)
Wave type: Unbroken green waves approaching
Water state: Relatively calm between sets
Safety: Safest zone when positioned correctly
Why the Lineup Is Ideal:
- Allows observation of approaching waves before they break
- Time to assess wave quality and choose which to catch
- Positioning closest to the peak gives you priority
- Resting spot between wave-catching attempts
- Social zone where lineup etiquette applies
Lineup Positioning Strategy:
- Too far outside: Waves won't reach you, you'll miss opportunities
- Too far inside: Caught in impact zone, taking waves on the head
- Sweet spot: Just beyond where most waves break, able to paddle for waves that form
Adjusting for Sets: The lineup position isn't static. When larger sets approach, paddle further outside temporarily. When lulls occur, paddle slightly inside to catch smaller waves. Experienced surfers constantly micro-adjust their lineup position.
JUDGING WAVE HEIGHT: THE BODY MEASUREMENT SYSTEM
Accurately assessing wave size is crucial for safety and session planning. Yet wave height measurement is one of surfing's most confusing and debated topics, with multiple conflicting systems creating unnecessary complexity for beginners.
The Problem with Feet Measurements
Experienced surfers describe waves in feet, but this system is deeply flawed:
- No standardization: "4 feet" means different things to different surfers
- Hawaiian vs face scale: Hawaiian measures from back (reads smaller), face scale from front (reads larger)
- Ego inflation: Surfers routinely exaggerate wave height
- Confusing for beginners: Abstract measurements don't relate to personal experience
The Body Height Method: A Better System
Why Body Measurements Work:
- Directly relatable to your physical experience
- Consistent across all surfers (everyone knows their body parts)
- Practical for the size range beginners actually surf
- Creates useful personal baselines for comfort assessment
The Body Height Scale:
Ankle High (1-1.5 feet face height):
- Description: Wave face from trough to crest is roughly ankle height
- Surfability: Barely rideable, suitable only for absolute first-timers on longboards
- Quality: Usually mushy and weak
- Learning value: Good for very first attempts at standing up
Knee High (1.5-2.5 feet face height):
- Description: Wave face reaches approximately knee level when standing
- Surfability: Perfect for first 5-10 sessions, especially on foam boards
- Quality: Gentle, forgiving, slow-moving
- Learning value: Ideal for pop-up repetition and basic board control
Waist High (2.5-3.5 feet face height):
- Description: Wave face reaches your waist when standing in the trough
- Surfability: Sweet spot for beginners and intermediates
- Quality: Enough power to generate speed, forgiving enough for mistakes
- Learning value: Perfect for learning turning and basic maneuvers
Chest High (3.5-4.5 feet face height):
- Description: Wave face reaches your chest level
- Surfability: Intermediate zone—requires solid fundamentals
- Quality: Significant power, faster waves, more consequence for errors
- Learning value: Progression to performance surfing
Head High (4.5-6 feet face height):
- Description: Wave face reaches or exceeds your head when standing in trough
- Surfability: Advanced zone—requires strong skills and confidence
- Quality: Heavy, powerful, fast-breaking
- Safety note: Beginners should not surf head-high waves
Overhead (6+ feet face height):
- Description: Wave face taller than a standing surfer
- Surfability: Expert only
- Quality: Extremely powerful, serious consequences
- Safety note: Requires years of experience and excellent fitness
How to Measure Accurately
The Trough-to-Crest Method:
- Identify the trough: The low point in front of the wave
- Identify the crest: The top/lip of the wave
- Measure the vertical distance: From trough to crest = wave face height
- Visualize your body: If you were standing in the trough, what body part would the crest reach?
Common Measurement Errors:
- Measuring only the wave back: Always measure the face (front) that you surf
- Cherry-picking the biggest wave: Assess average wave height in a set, not the anomaly
- Judging from the wrong angle: View waves from the side or from water level, not from elevated beach position
- Ego inflation: Be honest—underestimating is safer than overestimating your comfort level
Building Your Personal Wave Size Database
The real power of consistent wave measurement comes from building a personal reference database:
After Each Session, Record:
- Wave height using body measurements
- Your comfort level (1-10 scale)
- Number of waves caught
- Any difficulties or fear moments
- Successes and progressions
Example Journal Entries:
"Waist-high waves, felt 8/10 comfortable, caught 12 waves, successfully trimmed on 6 of them. Slightly intimidated by larger sets but managed them well."
"Chest-high waves, felt 5/10 comfortable, caught only 4 waves, spent too much time in impact zone. Need more practice before surfing this size again."
After 10-20 sessions with consistent measurement, you'll develop an accurate sense of: what size you're comfortable in, what size challenges you appropriately, and what size is beyond your current ability. Learning to assess your comfort level accurately is significantly enhanced by surfing with peers in group surf lessons where you can observe how other surfers at similar ability levels respond to the same conditions—this comparative perspective helps calibrate your own assessment skills and builds confidence through shared experiences in progressively challenging waves.
Modesty Is Wisdom:
When assessing wave height, err on the side of modesty. If you're debating between "waist-high" and "chest-high," call it chest-high. If you call waves smaller than they are, you may paddle out into conditions beyond your ability. Better to underestimate your assessment and be pleasantly surprised by manageable conditions than to overestimate and find yourself in danger.
UNDERSTANDING TIDE EFFECTS ON SURF CONDITIONS
Tides dramatically affect wave shape, quality, and surfability. Yet many beginners ignore tides entirely, missing the critical insight that the same beach at high tide versus low tide can offer completely different surfing experiences.

Photo by Nathan Anderson on Unsplash
Why Tides Matter
Water depth directly affects how waves break. Tides change water depth constantly (rising and falling), which means wave characteristics change throughout your session.
Key Understanding: The same swell hitting the same beach will produce different waves at different tides.
High Tide Characteristics
Water Depth Effects: At high tide, water is deepest over sandbars and reefs. Waves encounter deeper water before breaking, causing them to break further from shore and with different characteristics.
Wave Shape at High Tide:
- Fatter waves: Waves are fuller and rounder in shape
- Rolling breaks: Waves break more gently, peeling slowly
- Softer power: Less explosive energy, more forgiving
- Mushier face: Wave face is less steep, more sloped
- Slower peel: Wave breaks progressively but slowly down the line
Advantages of High Tide:
- Forgiving for beginners—softer, slower waves
- Easier to catch waves (less steep takeoff angle)
- More float and buoyancy in deeper water
- Safer—less risk of hitting bottom
- Better for longboarding and cruising style
Disadvantages of High Tide:
- May lack power for performance surfing
- Can be too fat/weak to generate speed
- Harder to paddle into mushy waves (need more speed)
- Less defined peaks—waves may close out
- Some spots don't work at all at high tide (too deep)
High Tide Strategy:
- Expect to paddle harder to catch waves
- Position slightly further inside (waves break further in)
- May need more volume in your board for better paddling
- Good time for practicing fundamentals without consequence
Low Tide Characteristics
Water Depth Effects: At low tide, water is shallowest over sandbars and reefs. Waves encounter shallow water sooner, causing them to steepen dramatically and break with more power.
Wave Shape at Low Tide:
- Steeper waves: More vertical face angle
- Hollow sections: Waves may barrel or tube
- Faster breaks: Waves peel quickly down the line
- Powerful faces: More force and energy
- Critical sections: Less margin for error
Advantages of Low Tide:
- More power for performance surfing
- Better defined peaks
- Faster, more exciting rides
- Potential for tube riding (advanced)
- Easier to catch waves (steeper takeoff)
Disadvantages of Low Tide:
- More dangerous—shallow water, risk of hitting bottom
- Less forgiving—mistakes have consequences
- May close out if too shallow
- Requires better technique and timing
- Can be intimidating for beginners
Low Tide Strategy:
- Be cautious—protect your head on wipeouts
- Position further outside (waves break earlier)
- Master timing—these waves are less forgiving
- Check for rocks or reef exposure
- Consider skipping low tide if you're a beginner at the spot
Mid-Tide: The Sweet Spot
Many surf spots work best at mid-tide (rising or dropping), offering a balance between high tide's forgiveness and low tide's power.
Why Mid-Tide Often Works Best:
- Optimal water depth for wave formation
- Good balance of power and safety
- Well-defined peaks with rideable shoulders
- Suitable for wide range of abilities
Tidal Movement and Your Session
Tides don't stay static—they're constantly changing. A 2-hour surf session might experience significant tidal change, altering conditions dramatically.
Tidal Change Strategy:
- Check tide times before session: Know whether tide is rising or dropping
- Predict how conditions will change: Waves will get fatter (rising) or steeper (dropping)
- Adjust positioning: As tide rises, position further out; as tide drops, position further in
- Be flexible: If conditions deteriorate, end session early or move to different peak
Example Scenario:
"You arrive at low tide. Waves are steep and powerful but you're intimidated. Instead of forcing it, wait 90 minutes for tide to rise. As water deepens, waves mellow. Same swell, safer conditions—simply by understanding tide timing."
Location-Specific Tides:
Every surf spot responds differently to tides. Some breaks only work at high tide, others only at low tide, many at mid-tide. Learning your local break's optimal tide window is essential. Ask local surfers or observe the beach at different tides to build this knowledge.
UNDERSTANDING WIND DIRECTION AND EFFECTS
Wind is the third critical factor in condition assessment. Wind can transform perfect waves into unsurfable mush, or clean up mediocre waves into gems. Learning to read wind direction and strength is essential for maximizing quality sessions.
Wind Assessment Framework
When describing wind conditions, surfers use a two-part system:
1. Wind Strength: Light, moderate, strong, or gusting
2. Wind Direction: Offshore, onshore, or cross-shore
Example: "Light offshore" or "strong onshore"
Wind Strength Classification
Light Wind (0-10 mph / 0-16 kph):
- Minimal effect on waves
- Slight breeze noticeable on skin
- Ocean surface relatively smooth
- Ideal for all surfing levels
Moderate Wind (10-20 mph / 16-32 kph):
- Noticeable wind pressure
- Creates texture on wave faces
- Direction becomes critical factor
- Can enhance or ruin conditions depending on direction
Strong Wind (20-30+ mph / 32-48+ kph):
- Significant wind pressure
- Difficult to paddle against
- Major impact on wave quality
- Often makes surfing challenging or impossible
Gusting Wind (Variable strength with strong bursts):
- Inconsistent, unpredictable
- Makes positioning difficult
- Can catch you off-guard
- Requires constant adjustment
Offshore Wind (From Land Toward Ocean)
When you face the ocean, offshore wind blows from behind you, from the land toward the sea.
Effects on Waves:
- Holds waves up: Delays breaking by opposing wave direction
- Grooms the face: Smooths out bumps and irregularities
- Creates clean surface: Glass-like wave faces
- Increases hollowness: Waves become more barrel-shaped
- Delays the break: Waves break slightly later and more predictably
Why Surfers Love Offshore:
- Produces the cleanest, most beautiful waves
- Easier to read wave behavior
- Better for carving and performance surfing
- Creates ideal conditions for photography
- Most predictable wave behavior
Offshore Challenges:
- Paddling difficulty: Must paddle against wind to reach waves
- Drift factor: Wind can blow you down the beach while sitting in lineup
- Extra effort required: Need more paddle power to catch waves
- Strong offshore danger: Can blow you out to sea if too strong (15+ mph)
Light Offshore (0-10 mph): The gold standard. Perfect conditions.
Moderate Offshore (10-20 mph): Still excellent but requires extra paddle power.
Strong Offshore (20+ mph): Can be dangerous—may blow you out to sea. Beginners should avoid.
Onshore Wind (From Ocean Toward Land)
When facing the ocean, onshore wind blows into your face, from the sea toward land.
Effects on Waves:
- Forces waves to break early: Waves collapse prematurely
- Creates chop: Bumpy, textured wave faces
- Flattens waves: Reduces wave height and power
- Crumbly breaks: Waves don't peel cleanly
- Whitecaps everywhere: Surface becomes messy
Why Surfers Dislike Onshore:
- Waves become hard to read
- Unpredictable break patterns
- Difficult to maintain balance on choppy faces
- Reduced ride quality and length
- Can make surfing impossible in moderate to strong conditions
When Onshore Is Acceptable:
- Light onshore (0-5 mph): Minimal impact, still surfable
- For beginners in whitewater: Onshore doesn't affect already-broken waves much
- When nothing else is available: Bad surf beats no surf
- For practicing in poor conditions: Builds adaptability
Moderate to Strong Onshore (15+ mph): Usually not worth the effort. Consider waiting for better conditions or finding a spot with different wind exposure.
Cross-Shore Wind (From Either Side)
Cross-shore wind blows parallel to the beach, from either left or right as you face the ocean.
Effects on Waves:
- Surface texture: Creates bumps and ripples on wave faces
- Drift factor: Blows you sideways along the beach
- Uneven breaking: Waves may be affected differently along their length
- Variable quality: Depends on wind strength
Impact Based on Strength:
- Light cross-shore (0-10 mph): Minimal impact, quite surfable
- Moderate cross-shore (10-20 mph): Noticeable drift, bumpy faces, manageable
- Strong cross-shore (20+ mph): Difficult positioning, constant drift, challenging
Cross-Shore Strategy:
- Position upwind (toward wind source) to compensate for drift
- Expect to paddle sideways frequently to maintain position
- Choose peaks that are more protected from cross-wind
- Be aware of drifting into other surfers
Reading Wind on the Beach
Visual Indicators:
- Flag direction: Shows exact wind direction
- Wave surface texture: Smooth = offshore, choppy = onshore
- Spray direction: Watch spray blow off wave lips
- Feel on your face: Turn 360 degrees to identify direction
- Tree/plant movement: Indicates wind strength
MAKING THE GO/NO-GO DECISION
Assessing conditions isn't just about observation—it's about making informed decisions about whether to surf, where to surf, and how to approach your session.
The Three-Question Framework
Before every surf session, answer these three questions in order:
Question 1: How big are the waves?
Use body measurements. Be honest. Compare to your experience database.
Example answer: "Waist to chest high, with occasional bigger sets."
Question 2: What is the tide doing?
Is it high, low, or mid? Rising or dropping? How will this affect the waves?
Example answer: "Mid-tide, rising. Waves will get fatter over the next hour."
Question 3: What is the wind doing?
Direction? Strength? How is it affecting the wave quality?
Example answer: "Light offshore, maybe 5-10 mph. Clean conditions."
Synthesis and Decision Making
Combine your three answers into a coherent assessment:
Example Assessment #1:
"Waist-high waves, high tide making them fat, light offshore wind. Should be mellow and fun. Perfect for practicing turns. Will need to paddle hard to catch waves because they're mushy."
Decision: Go surf. Low risk, good learning conditions.
Example Assessment #2:
"Head-high waves, low tide making them steep and hollow, moderate onshore wind making them choppy. These are at my limit and the wind is making them messy."
Decision: Either skip it and wait for better conditions, or accept this as a challenging session where you'll struggle but learn.
Example Assessment #3:
"Chest-high waves, mid-tide dropping, light cross-shore wind. Waves have some power but manageable. Wind isn't ideal but not terrible."
Decision: Go surf. Slightly challenging but within comfort zone. Position slightly upwind to account for drift.
Building Your Condition Memory Bank
The real skill development comes from building a mental database of conditions and your performance in them:
After Each Session, Mentally Note:
- The three-question assessment
- Your comfort level (1-10 scale)
- Number of waves caught
- What went well
- What was challenging
- Would you surf these conditions again?
Pattern Recognition Development:
After 20-30 sessions with consistent assessment, you'll start recognizing patterns:
- "I always do well in waist-high, mid-tide, light offshore."
- "I struggle in chest-high, low tide conditions—need more practice."
- "Onshore wind above 15 mph ruins my sessions—not worth it."
This pattern recognition becomes your personal forecasting ability. You'll be able to look at a forecast and know: "Tomorrow will have conditions I excel in" or "Tomorrow is too big for me—I'll wait." During surf camp experiences, this condition assessment learning is dramatically accelerated as you surf different conditions daily with coaches who help you understand your comfort zones and recognize patterns quickly—compressing what might take months of solo learning into days of guided progression.
The Honesty Principle:
Accurate condition assessment requires brutal honesty with yourself. If waves are at your limit but your ego wants to surf anyway, you're not assessing conditions properly—you're letting ego override judgment. The best surfers are honest about their abilities and choose sessions strategically. There's no shame in waiting for conditions that suit your level. Every expert surfer still does this.
Safety Decision Making
When to Definitely NOT Surf:
- Waves more than 2x your comfortable size
- Strong offshore wind (20+ mph) combined with any wave size
- Rip currents too strong to paddle against
- Lightning or thunderstorms in area
- You're alone and conditions are at your limit
- You feel sick, tired, or hungover
- Equipment issues (leash broken, board damaged)
When to Surf with Caution:
- Conditions slightly above your normal comfort zone
- Crowded lineup with aggressive surfers
- Unfamiliar break (you don't know the hazards)
- Changing conditions (rising swell forecast)
- First session after a long break
When to Surf with Confidence:
- Conditions match or are below your comfort level
- Familiar spot where you know the hazards
- Other surfers in the water (safety in numbers)
- Good visibility and daylight
- You feel strong, healthy, and confident
Related Resources
Build your condition assessment confidence with these essential preparation guides:
Six Things to Know Before Your First Surf Lesson
Prepare for success with essential knowledge about conditions, expectations, and safety considerations for your first time in the water—perfect complement to understanding condition assessment.
Learn to Surf at Any Age
Understand how age and fitness affect your condition preferences and safety considerations, with practical advice for choosing appropriate surf sessions regardless of when you start.
Continue Building Your Surf Knowledge
Condition assessment is a lifelong skill that develops with every session. Even professional surfers constantly refine their ability to read conditions and make strategic decisions.
Related Chapters for Deeper Understanding:
- ← Back to Beginner's Guide Homepage
- Chapter 2: Controlling Your Surfboard in the Lineup
- Chapter 4: The Importance of Correct Stance →
- Chapter 5: How to Read Waves for Surfing
- Chapter 8: Paddling Out Techniques
Learn Condition Assessment from Experienced Coaches
While guides provide knowledge, nothing replaces real-time coaching in varying conditions. Our private surf lessons offer personalized condition analysis tailored to your specific comfort level and goals, with coaches who adjust instruction based on real-time environmental changes to maximize both safety and learning effectiveness.